
Gang Hideouts (Single Player)
There are 8 Gang Hideouts to clear out in the single player campaign, 7 of them (excluding Solomon's Folly) must be completed at least once towards 100% completion.
Each one offers fame, money, and a new weapon upon completion. Once completed you can re-visit each one after some time has passed, like 24 hours or so.
PS3 players or those with Game of the Year Edition (including all recent re-releases of the game) have 1 additional hideout to clear out at Solomon's Folly but, it is not required for 100% completion.
Check out our gang hideouts map for locations of each of them.

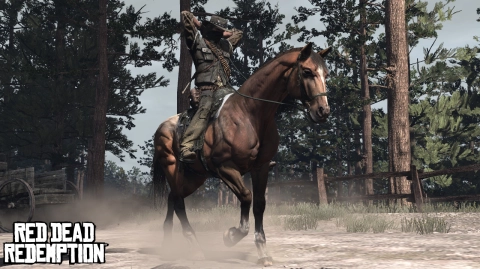
I have provided a mini-map of their locations next to the photo of each hideout below.
Table of Contents
Gang Hideouts in New Austin
There are 6 hideouts in New Austin. Solomon's Folly is optional and not required towards 100% completion.
Pike's Basin

GANG USING THIS LOCATION:
- The Bollard Twins Gang
REQUIREMENTS:
- Must complete the mission, “Justice in Pike's Basin” to unlock.
REWARD:
- Sawed-Off Shotgun
WALKTHROUGH
- Enter the Basin from the West
- MEET THE RANCHER NEAR THE CANYON FORK
The Bollard Twins Gang stole his cattle. Help him get them back.

- NAVIGATE THE TERRAIN TO THE MAIN BASIN
Take cover when you can. This portion of the hideout is where most of the enemies are. The Rancher can die too so be careful. However, the mission still completes if the rancher dies.


Don't forget to search the various chests in and around the tents for a decent cash boost.

- CLEAR A PATH FOR THE RANCHER
If Rancher is alive

- FINISH OFF THE REMAINING MEMBERS
If Rancher is dead.

It's not a terribly hard hideout at all but, the Rancher can easily die once you reach the main basin so, if you want to keep him alive, be prepared to provide cover for him because, he will charge into there. If he dies, you miss out on earning positive honor.

Twin Rocks

GANG USING THIS LOCATION:
- The Walton Gang
REQUIREMENTS:
- Available at the beginning of the game (after "New Friends, Old Problems").
REWARD:
- Volcanic Pistol
WALKTHROUGH
- MEET THE RANCHER OUTSIDE OF TWIN ROCKS
The Walton Gang has kidnapped his Daughter and holding her hostage in the house.

- KILL THE WALTON GANG
Be careful of the snipers on the Twin Rocks at the entrance of the area.

- KILL THE REMAINING MEMBERS
The remaining gang members file out of the house so, be ready.

- RESCUE THE RANCHER'S DAUGHTER IN THE BEDROOM
Using deadeye makes this a little easier. Simply kill the remaining gang member inside to complete hideout.

The mission will still complete if you fail to save the rancher's daughter. If you fail to save her, you receive -200 honor though, so keep that in mind.


Fort Mercer

GANG USING THIS LOCATION:
- The Banditos
REQUIREMENTS:
- Must complete the mission, “We Shall Be Together in Paradise” to unlock.
REWARD:
- Semi-Automatic Pistol
WALKTHROUGH
- MEET THE GUNSLINGER BY THE WALL
He wants your assistance in getting into the Fort. The Banditos are using it as a hideout and there's a lot of stolen money inside.

- CLIMB THE WALL, OPEN THE DOOR FROM THE INSIDE
After taking out the Banditos on the upper level, you can either head down to ground level and open the door to let the gunslinger in, or you can wait to open it after you finish off the gang.


- KILL ALL BANDITOS
If you opened the door, the gunslinger will assist you. He can die here so be careful. The mission still completes though if he dies. Otherwise you can take care of them all on your own and leave him outside until the area is clear.
If you complete the mission with the gunslinger still alive, follow him to collect your reward. If he dies, you get the money upon completion. You miss out on receiving positive honor if you let him die.


OTHER TIPS:
- There is a safe on the upper level of the Fort that can be broken into. You will receive negative honor though for cracking it but, it's also a way to make some more money (around $70) when going through this hideout.


Once you reach the treasure room after disposing of all enemies, the hideout is complete. You'll find your reward weapon waiting on a table, so be sure to collect it.


Tumbleweed

GANG USING THIS LOCATION:
- Various Criminals/Bounty Hunters
REQUIREMENTS:
- Must complete the mission, “Let the Dead Bury Their Dead” to unlock.
REWARD:
- Winchester Repeater
WALKTHROUGH
- FREE THE CAPTURED SHERIFF
There is a captured Sheriff in this town. If you free him, he may help and reward you.
You still get a reward if he dies but, you miss out on more positive honor if he does die. The mission will still progress and finish whether he is alive or not.

- KILL THE CRIMINALS IN TOWN
You're going to have to be careful maneuvering through the town as enemies come from all sorts of directions. It's probably best to stay near the edge of the town, and move into the center of town once there's a few enemies left.

- KILL THE CRIMINALS IN THE MANSION
Head on up to the giant mansion sitting on top of the hill. Take cover on your way up there because, the enemies will be shooting at you from cover as well. Once you've taken care of the ones outside, head inside to finish them off. You might have to go into the basement for the last remaining ones. There's stairs inside the mansion, and there is an entrance outside in the back.


This one can be challenging because, the enemies are abundant. Pay attention and don't hesitate to move through the town slowly because, running into the action could spell disaster for you and the sheriff.

Gaptooth Breach

GANG USING THIS LOCATION:
- Treasure Hunters
REQUIREMENTS:
- Must complete the mission, “Man is Born Unto Trouble” to unlock.
REWARD:
- Springfield Rifle
WALKTHROUGH
- JOIN THE INJURED STRANGER
Meet him by a crate outside the mine.
He wants you to rescue his friend Floyd who can be found at the top of Gaptooth Breach. This is optional but rescuing him will give information on where to find the treasure in the mine.

- GO TO THE MINE ENTRANCE
The Treasure Hunters are protecting some loot located inside the mine.
You'll have to take care of all the Treasure Hunters outside first to make it easier.

- SEARCH THE MINE FOR TREASURE
Navigate the tunnels carefully. The treasure is located at the North-East corner of the mine.


- GO TO THE MINE EXIT
You'll have to kill some more Hunters on your way towards the exit.

Navigating through the tunnels can be a bit tricky and it's easy to get lost if you haven't been down there before. Take the first left down there to approach the main area inside the mine from above.

OTHER TIPS:
- This is a great place to finish the 10th level of the "Sharpshooter Challenge" once you've unlocked it because, enemies can be singled out and disarmed without the interference of others. Once you enter the mines, slowly navigate the mine with your pistol out. Use Dead Eye to disarm the enemy, and then put a bullet in his head to get him out of the way. Do this another 5 times and you will complete the challenge. Make sure you bring some items that restore your Dead Eye meter.
Solomon's Folly
Solomon's Folly was originally a PS3 exclusive gang hideout, however it's included in all recent releases of the game by default. It's not required for 100% completion though.

GANG USING THIS LOCATION:
- The Walton Gang
REQUIREMENTS:
- Unlocked at the beginning of the game (after "New Friends, Old Problems").
REWARD:
- Money
WALKTHROUGH
- MEET THE SHERIFF NEAR THE ROCK
The Walton Gang has stolen a safe from the Bank in Armadillo. The Sheriff has requested that you help him get it back.

- CLEAR OUT THE WALTON GANG
Slowly navigate your way through the area, taking cover when you can. Work your way towards the barn and the coach sitting out front.

- SEARCH THE CHEST IN THE BASEMENT
Near the Sheriff is a set of stairs you can head down into a room. Search the chest in here to discover a Walton Gang Outfit scrap.


- RETURN THE WAGON TO THE ARMADILLO BANK
Hop on the Wagon and drive it safely back to Armadillo. The Walton Gang will however chase you all the way back so, be prepared to shoot while driving the coach as the Walton Gang are relentless and never give up until you reach Armadillo.


This is the only Gang Hideout that actually finishes in a different place than it originally began at. And if you're not careful, the Walton Gang could make quick work of you once you get on the wagon and head for Armadillo.

OTHER TIPS:
- If you have the Walton Gang outfit, you can exploit a "quick money" glitch I discovered. Enter Solomon's Folly and go right up to the safe on the wagon. Break into it and take the money. The only person that won't approve of your actions is the Sheriff that's trying to get the safe back. Kill him, leave the area, return, and everything resets. You can do this as many times as you want.
Gang Hideouts in Nuevo Paraiso
There are 2 gang hideouts in Nuevo Paraiso. Both are required towards 100% completion.
The following gang hideouts require access to Nuevo Paraiso which is unlocked around half way through the main story. They cannot be attempted if you get to Mexico early using the camp exploit.
Nosalida

GANG USING THIS LOCATION:
- Reyes' Rebels
REQUIREMENTS:
- Unlocked upon arrival to Mexico (after "We Shall Be Together in Paradise").
REWARD:
- Henry Repeater
WALKTHROUGH
- APPROACH THE GENERAL TO OFFER YOUR ASSISTANCE
The General needs your assistance in eliminating the Rebels. He tells you to burn down the building with the fire bottles he provides. This may be the first time you acquire fire bottles in the game.


- DESTROY THE BUILDINGS
You'll have to eliminate the Rebels who are marked with red blips on the radar, while you working on the burning the buildings which are marked with yellow blips, so make sure you pay attention to the enemies. You can clear out all of the enemies before you burn any of the buildings to make things a bit easier. - You can either burn down the buildings by throwing a fire bottle at them, or by shooting the lanterns that are attached to each building. The two ships in the harbor don't have any lanterns on them so you'll need to use fire bottles for those.


- RETURN TO THE GENERAL FOR REWARD
Once all the buildings are burning, return to the General's location to collect your reward.


This hideout can be tricky to complete, especially at night. If you shoot a Mexican Army member, of which there are numerous at the hideout, the Army immediately turns on you and tries to kill you instead of the Rebels. So, be careful who you shoot at! Make sure you only target the enemies marked with red blips.

After the mission you should acquire a new weapon automatically - the Henry Repeater.

Tesoro Azul

GANG USING THIS LOCATION:
- Reyes' Rebels
REQUIREMENTS:
- Must complete the mission, “The Demon Drink” to unlock.
REWARD:
- Double-Action Revolver
WALKTHROUGH
- MEET THE SHERIFF NEAR THE BROKEN WAGON
The Sheriff explains some of his men have been killed and one has been captured. He wants you to rescue him.


- KILL THE CRIMINALS IN TOWN
Slowly navigate through the town, taking out what you see. This hideout isn't very hard at all, just pay attention to the red blips on the radar. There's plenty of cover so just move slowly and take out the enemies as they pop up.


- RESCUE THE DEPUTY FROM THE GANG LEADER
The mission still completes if you fail to save him, but using Dead Eye is obviously the best way to rescue him. The gang leader can take a few more bullets than the average criminal so, keep that in mind if you get into a shootout with him.


The mission will still finish up if the gang leader kills the deputy, you'll just miss out on additional positive honor.
Grab a shotgun from behind the building with the deputy.


You must complete all gang hideouts at least once (except for Solomon's Folly which is optional) as a requirement towards 100% completion.
100% Completion
| Checklist | |
|---|---|
| Missions |
Story Missions
| New Austin | |
|---|---|
| Intro | |
| Bonnie MacFarlane | |
| Marshall Johnson | |
| Nigel West Dickens | |
| Seth Briars | |
| Irish | |
| Nuevo Paraiso | |
| Irish | |
| Vicente De Santa | |
| Landon Ricketts | |
| Luisa Fortuna | |
| Abraham Reyes | |
| West Elizabeth | |
| Edgar Ross | |
| Harold MacDougal | |
| Homestead | |
| Abigail Marston | |
| Uncle | |
| Jack Marston | |
Stranger Side-Missions
| New Austin | |
|---|---|
| Nuevo Paraiso | |
| West Elizabeth | |
| Finale |
Side Objectives
| Tasks | |
|---|---|
| Collectables |